Spooky Easy Halloween Popsicle Treats
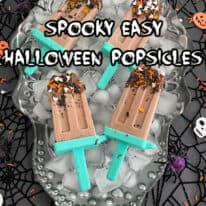
If your kids love a good Halloween treat but you’re not into baking all day, these spooky popsicles are your new best friend. They’re cold, colorful, and ridiculously easy to make. No cauldron required. This is one of those recipes that looks festive but takes barely any effort, which makes it perfect for busy parents trying to pull off something fun for Halloween parties or after-school snacks. While this post is sponsored by Florida Milk, our love for Halloween and treats is our own.

Why This Is the Perfect Halloween Treat
There are plenty of Halloween treats out there that involve frosting, ovens, or a small mountain of sugar. These popsicles are different. They’re cold, colorful, and easy to customize. The best part is you can make them as simple or as creative as you want.
The creamy base comes from yogurt, which gives you a nice texture and a dose of protein and calcium. If you prefer dairy-free, you can swap in coconut or almond milk yogurt. Add a drizzle of chocolate syrup or swirl in cocoa powder, and suddenly you’ve got a spooky marbled look that kids go nuts for.
When I make these at home, I set up a mini “decorate your own Halloween treat” station. I put out candy eyes, crushed cookies, sprinkles, and melted chocolate, and let the kids create their own monster popsicles. It’s part craft, part snack time, and keeps them entertained long enough for me to clean up the pumpkin carving mess.

And when I say that they were easy to make, I’m not joking…the main ingredient is chocolate milk.

Yes, that’s it! It’s the perfect main ingredient too, since chocolate milk is the official drink of Halloween.
Plus, you can feel good about serving these Spooky Halloween popsicles to your friends and family because while they are a sweet treat, they are also nutritious.

Did you know that chocolate milk delivers 13 essential nutrients? Each serving of chocolate milk has 8 grams of high-quality protein, including calcium, vitamin D and phosphorus. So when you serve these chocolate milk Halloween popsicles you can feel good knowing that you are serving a spooky, yet nutritious Halloween treat.

Ingredients You’ll Need
- Chocolate Milk
- Chocolate Chips
- Halloween Sprinkles
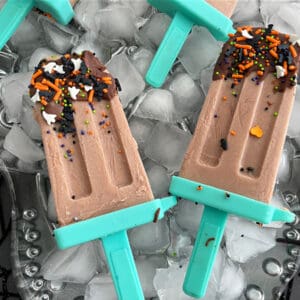
We melted the chocolate chips so that we could dip our chocolate milk popsicles into it for an extra chocolatey treat, and we, of course, had to add in Halloween sprinkles!

Pro Tips For Decorating Halloween Popsicles
- Double boiler method to melt the chocolate is the best way to melt chocolate.
- Adding a cap full of canola oil will keep the chocolate smooth.
- Don’t melt the chocolate until the popsicles are fully frozen and ready.
- Use spatula to drizzle chocolate on the top of the popsicles, covering around ⅓ of the way down. Do not dip the popsicles into the chocolate, this will cause all of the chocolate to harden.
- Use Halloween sprinkles! I got mine at Michael’s, but I have seen them at Walmart and Target too.
- When serving, be sure to have ice on the platter to keep your Halloween popsicles from melting.

Serve your Spooky Chocolate Milk Popsicles on a festive Halloween platter to really set the mood. I found mine at HomeGoods, but there are tons of great options on Amazon too. And don’t skip the plastic spiders! You can grab a bag or two from the dollar store or any seasonal aisle this time of year. Scatter them around the table for that creepy-crawly vibe, but if you put them directly on the platter, give everyone a heads-up that they’re not part of the snack lineup.

Do you have to use the double broiler method to melt the chocolate?
I will be honest, I was slow to getting on the double-broiler train, but it really is the best way to melt chocolate. You are using indirect heat to melt the chocolate, which helps prevent over-cooking the chocolate. When chocolate is overcooked it gets hard and lumpy. Definitely not ideal for decorating our Halloween popsicles. We didn’t test this recipe using melting chocolates in the microwave, but if you try it, let us know how it turns out!

How to melt chocolate using a double broiler
- Place a saucepan on the stove and add 1-2 inches of water to the pan.
- Place a heat-safe mixing bowl over the saucepan. Make sure that it fits well so that the steam is trapped in.
- Add the chocolate chips to the bowl.
- Turn the stove onto medium heat, as the water starts to warm up, it will steam. The steam will start to melt the chocolate.
- Continuously stir with a heat-safe rubber spatula or wooden spoon until all of the chocolate has melted.

It may seem like using the double broiler method for melting the chocolate chips is more time consuming, but I promise you, it’s 100% worth it!

Why Parents Love These Halloween Popsicles
Aside from being cute, these Halloween popsicles are an easy way to offer a treat that feels festive but not over-the-top. They’re cool, refreshing, and lighter than most Halloween desserts. They also double as a fun activity for kids.
If you have little ones who aren’t big on traditional candy, this is a perfect alternative. You can sneak in a little nutrition while still making something that feels like a party. Plus, they’re freezer-friendly, so you can make a batch early in the week and pull them out whenever your kids ask for “something spooky.”
Storage and Make-Ahead Tips
These popsicles keep well in the freezer for up to a week. Store them in an airtight container or freezer bag to prevent freezer burn. If you’re making them ahead for a Halloween party, just transfer them to a cooler with ice packs right before serving. They’ll hold up perfectly and look great on a Halloween-themed tray.

Hosting a Halloween Party? Try This
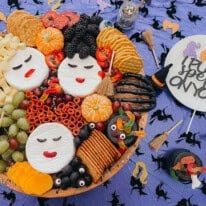
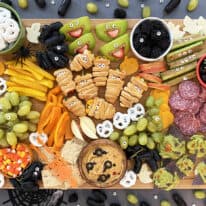
If you’re planning a Halloween party for kids, these popsicles are a hit at the dessert table. Serve them with other bite-size snacks like monster apple bites or mummy mini peppers for a colorful, healthy mix of sweet and savory treats.
You could even set up a DIY popsicle bar where kids can choose their own toppings before you freeze them. It’s messy but memorable, and the photos are gold.
More Healthy Halloween Treats You’ll Love
If you’re ready to keep the spooky fun going, check out these other kid-friendly Halloween recipes from our kitchen:
Each one is quick to make, festive, and guaranteed to disappear fast once the kids get involved.
FAQs for our Making Spooky Easy Halloween Popsicles
Q: How long does it take to make Spooky Easy Halloween Popsicles?
A: Spooky Easy Halloween Popsicles take 10 minutes total time – 5 minutes prep time and 5 minutes cook time.
Q: What are the main ingredients in Spooky Easy Halloween Popsicles?
A: The main ingredients in Spooky Easy Halloween Popsicles are chocolate milk, chocolate chips, Halloween sprinkles, and vegetable or canola oil.
Q: How many servings do Spooky Easy Halloween Popsicles make?
A: Spooky Easy Halloween Popsicles makes 6 servings.
Q: What is the calorie count per serving for Spooky Easy Halloween Popsicles?
A: Each serving of Spooky Easy Halloween Popsicles contains about 359 calories.
Q: What are the best tips for decorating spooky Halloween popsicles?
A: Tips include using the double boiler method to melt chocolate, adding oil to keep the chocolate smooth, waiting until popsicles are frozen to melt chocolate, drizzling instead of dipping chocolate, and using Halloween sprinkles.
Let’s make our Easy & Spooky Halloween Popsicles!
Spooky Easy Halloween Popsicles
Ingredients
- ½ gallon Chocolate Milk
- 1 cup Chocolate Chips
- Halloween Sprinkles
- Vegetable or canola oil use your oil cap or 1/2 tbsp
Instructions
- Pour chocolate milk into popsicle molds. Freeze for at least 2 hours or until popsicles are fully frozen.
- Melt chocolate using the double boiler method. Use a small pot to boil 1-2 inches or water. Once boiling, lower temperature to medium low and place a glass bowl on top of the pot. Add chocolate chips and oil to boil. Use spatula to mix.
- Remove popsicle mold from freezer and run under warm water for 1 minute to slightly loosen the popsicles making them easier to remove from the molds. Place popsicles on parchment paper lined baking sheet.
- Use a spatula to drizzle chocolate on the top of the popsicles, covering around ⅓ of the way down. Immediately top with sprinkles allowing them to adhere to the chocolate before it hardens.
- Store the popsicles in the freezer until ready to serve.
Notes
Nutrition
Have a spooky Halloween!


Easy and fun for scary movie night!